Today started with a sample - I tried out all the tensions (I settled on '1'), and whether to use cream thread, white thread, or a mix of cream and white. I settled on cream. I also tested whether to sew the seam once it was trimmed and ironed and decided it didn't need it.
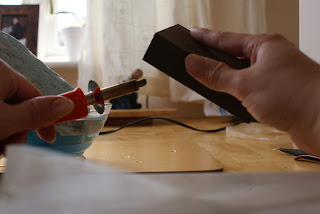
For the seams of the voile I decided to make the most of the synthetic fabric and heat cut after sewing - this heat seals the edges. Heres my set up - a marble cutting board (glass is usually recommended), a metal ruler, the soldering iron with a pointed tip, a water soaked sponge and some more cleaning items (a sanding block, emery board and nail cuticle remover which can get rid of the worst bits).
Get your fabric and ruler ready..
Line up the seam so that its straight..
Then move the ruler up to give a seam allowance.
Hold down, be careful to keep your fingers away from the blade!
Then smoothly cut (I had to remove my fingers as I was taking this picture)!
Peel away the excess whilst still holding the ruler. It might be worth cutting away the excess as you go rather than keeping one big strip - especially with hot knifes around!
Unfortunately the tip becomes pretty grubby - if its not cleaned regularly this transfers to the fabric.
To clean keep a soaked sponge nearby and clean as you go - use the wet part of the sponge. Just to let you know the sponge WILL be ruined so perhaps keep one set by just for this.
Even with the sponge there may still be some residue...
So use fine sandpaper to clean this off. Use brisk movements as the sandpaper will burn too!
An emery board is also useful.
Heres the completed cut seam.
So I've sewn all the seams in the voile fabric. NB apart from one seam at each side, like the other skirt layers - the skirt layers are now in two sections 'front' and 'back'.
I have a few more pics but I'll save them for tomorrow as this post was more of a tutorial!


No comments:
Post a Comment